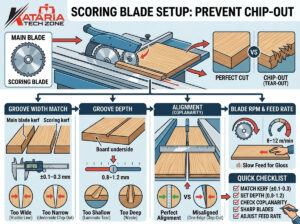
Few things hurt a stone workshop’s profit like a cracked slab or a chipped edge. Marble, granite, quartz and engineered stone are expensive, and a single split slab can wipe out the margin on an entire job. The frustrating part is that cracking and chipping rarely have just one cause. They usually come from a combination of slab condition, machine setup, tooling, cutting parameters and cooling.
This troubleshooting guide from Kataria Tech Zone explains why slabs crack and chip during CNC stone cutting, how to identify the real cause, and what to change to stop it. Whether you run a CNC stone router for countertops, temple carving, monuments or decorative panels, these practical fixes will help you protect your material and your reputation.
Why Stone Cracks and Chips: The Basics
Stone is hard but brittle. It resists compression well, but it has low tensile strength, so it fails suddenly when stress is applied unevenly. Natural stone also contains veins, fissures, pits and mineral variations that create weak zones. Engineered stone can hold internal stress from manufacturing.
In CNC cutting, three kinds of stress cause most damage:
- Mechanical stress from cutter pressure, vibration and poor support.
- Thermal stress from heat build-up when cooling is inadequate.
- Residual stress already locked inside the slab before you touch it.
Chipping is usually a surface or edge failure at the cutter entry or exit. Cracking is deeper and travels through the slab, often along a natural weakness. Knowing which one you have is the first step in troubleshooting.
Quick Troubleshooting Table
| Symptom | Most Likely Causes | First Fix to Try |
|---|---|---|
| Chipping at cut entry | Plunging too fast, blunt tool | Use a ramped or arc lead-in, reduce entry feed |
| Chipping at cut exit | Unsupported edge, high feed | Slow feed at exit, add sacrificial support |
| Chipping along the top edge | Wrong tool grit, vibration | Switch to finer grit, check rigidity |
| Crack starting at inside corner | Sharp corner, stress concentration | Add corner radius, drill relief holes |
| Crack running along a vein | Natural fissure, uneven support | Inspect slab, reinforce with mesh or resin |
| Crack mid-cut | Heat shock, clamping stress | Increase coolant, reduce clamp pressure |
| Slab splits during handling | Poor lifting or storage | Use correct lifting and vertical A-frame storage |
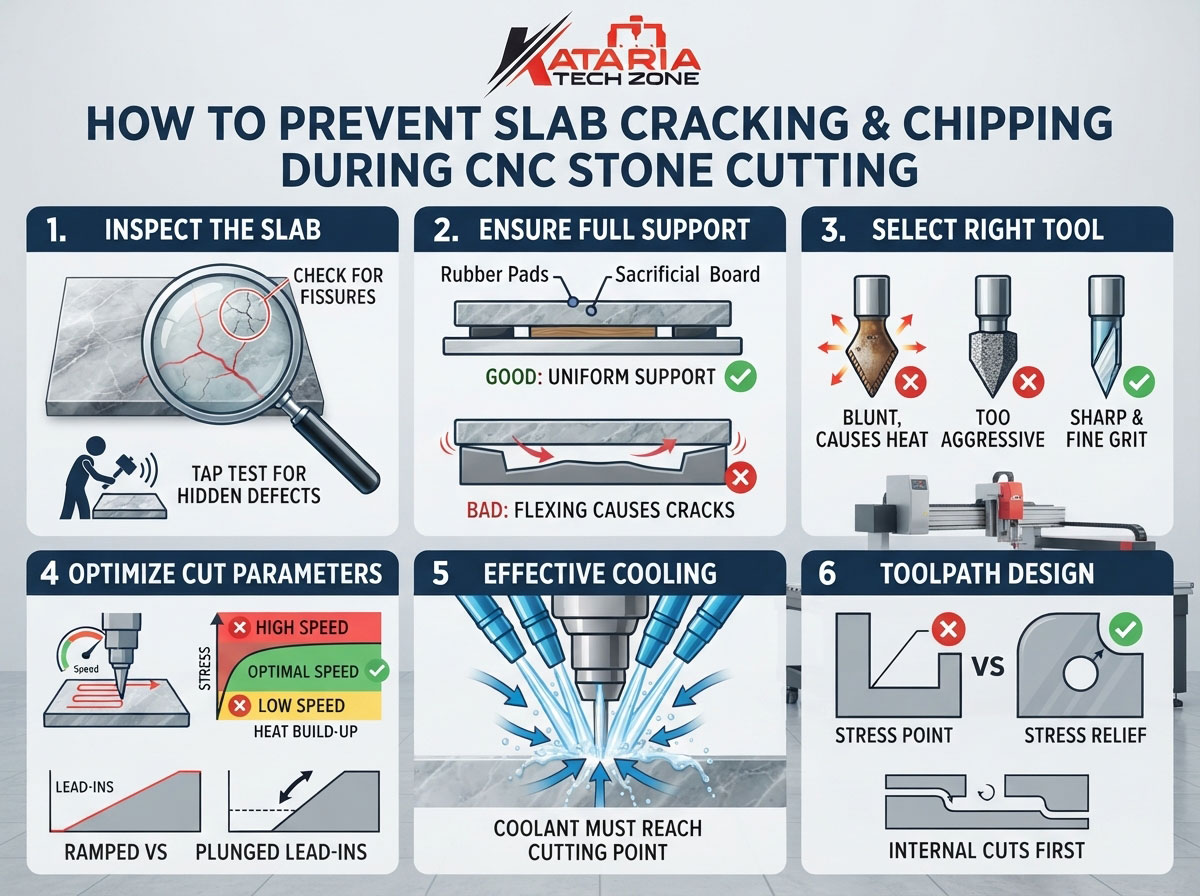
Cause 1: Inspect the Slab Before You Cut
Many failures are decided before the machine starts. Skipping inspection is one of the most common and expensive mistakes.
What to check:
- Visible fissures and hairline cracks. Wet the surface and look under strong light. Cracks that are invisible when dry often show up when wet.
- Veins and soft zones. Marble and some granites have natural veins that weaken the slab. Plan cuts so fragile areas sit in waste or low-stress positions.
- Resin-filled or mesh-backed slabs. Many marbles are reinforced at the factory. Check that the reinforcement is intact and well bonded.
- Thickness consistency. Uneven thickness causes uneven support and stress on the vacuum or clamp system.
- Moisture. A damp slab cut too soon after washing or storage outdoors can behave unpredictably.
Practical tip: Tap the slab gently and listen. A clear ring suggests solid stone, while a dull sound can indicate internal cracks.
Cause 2: Poor Slab Support and Fixturing
Stone must be supported across its full area during cutting. Any hollow or high spot beneath the slab lets it flex under cutter pressure, and flexing is how cracks begin.
Best practices:
- Use a flat, well-maintained table and confirm it is level before every job.
- Place the slab on rubber or foam pads, or a sacrificial board, so contact is uniform.
- Support cutouts and narrow strips, especially near sinks, cooktops and slender bridges, which are the most fragile areas.
- Avoid over-tightening clamps. Excess clamp force creates internal stress that releases as a crack when the cut path changes the slab’s shape.
- Keep the vacuum system clean and sealed if you use suction fixturing, since uneven vacuum pull can distort thin slabs.
If you cut a narrow rectangle out of a slab, remember it loses stiffness quickly. Leave small tabs (bridges) where possible, and remove them last.
Cause 3: Wrong Tool Type, Grit or Condition
The cutter does the actual work, so tool selection matters enormously.
Common tooling mistakes:
- Using a worn or glazed tool. A blunt tool rubs instead of cuts, creating heat and pressure that chip edges.
- Wrong bond or grit. Coarse grit removes material fast but leaves rough, chip-prone edges. Very fine grit on hard granite may glaze and overheat.
- Low-quality diamond. Poor diamond concentration or weak bonding wears unevenly.
- Wrong tool for the material. Marble, granite and quartz each respond differently.
Fixes:
- Use diamond tooling designed for stone and matched to the specific material. For a deeper comparison, read our guide on diamond vs. carbide tooling for CNC marble and granite.
- Dress or replace tools that show glazing, uneven wear or reduced cutting speed.
- Use a roughing pass with a coarser tool, then a finishing pass with a finer one. This leaves less material for the final cut and reduces edge chipping.
- Keep a tool life log so you replace tools before they damage a valuable slab.
Cause 4: Incorrect Feed Rate, Spindle Speed and Depth of Cut
Cutting parameters are a balancing act. Too aggressive and the stone chips or cracks. Too slow and heat builds up or the tool glazes.
General guidance:
- Reduce feed rate in hard, brittle or heavily veined stone.
- Use shallow depth per pass rather than trying to cut through in one go. Multiple lighter passes reduce load on the slab.
- Maintain proper spindle RPM for the tool diameter and stone type. Incorrect speed increases vibration and edge damage.
- Slow down at entry, exit and corners. These are the moments when stress peaks.
- Use climb or conventional milling strategically. Depending on your tool and stone, one direction may give a cleaner edge, so test on offcuts.
Always follow your tool manufacturer’s recommended speeds as a starting point, then refine through test cuts on scrap material of the same type.
Cause 5: Insufficient Cooling and Water Management
Heat is one of the biggest hidden causes of cracking. When a hot tool meets stone, the local temperature difference creates thermal shock. Poor coolant flow also lets stone slurry build up around the cutter, increasing friction.
How to fix it:
- Make sure coolant reaches the cutting point, not just the general area. Check nozzles for blockage and correct aim.
- Maintain steady water flow throughout the entire cut, including at slow corners.
- Use clean water and filter or replace it regularly, since slurry-heavy water reduces cooling and dulls tools.
- Avoid sudden starts and stops of coolant, which cause thermal shock.
- In cold weather, avoid spraying very cold water on a warm slab.
If you see discoloration or burn marks near the cut, that is a clear warning that cooling is inadequate.
Cause 6: Machine Rigidity, Vibration and Maintenance
A machine that vibrates transfers that vibration directly into the stone. Even a well-chosen tool will chip edges if the router is not rigid enough or is poorly maintained.
Check these areas regularly:
- Spindle condition: Worn bearings cause runout and vibration.
- Guides, rails and ball screws: Play or looseness reduces accuracy.
- Gantry and frame: Stone work needs a heavy, rigid structure. Lightweight machines struggle with hard materials.
- Tool holders and collets: Dirt or wear leads to runout.
- Foundation and leveling: The machine should sit on a stable, level base.
This is why machine choice matters so much for stone. A purpose-built CNC stone router machine has the heavy frame, water management and spindle power needed for consistent results. For a related look at how rigidity affects cutting capability, see our post on heavy-duty gantry vs. light frame CNC routers.
Cause 7: Toolpath Design and Corner Geometry
The way you program the cut has a large effect on stress distribution.
- Avoid sharp inside corners. They concentrate stress and often start cracks. Add a small radius wherever the design allows.
- Drill relief holes at inside corners of cutouts such as sink openings before routing the outline.
- Use arc or ramped lead-ins instead of plunging straight down.
- Plan cut order carefully. Cut internal features first while the slab is still at full stiffness, then the outer shape.
- Leave tabs on delicate pieces and remove them at the end.
- Avoid long thin unsupported sections that can snap under their own weight.
CAM simulation helps here. A smooth, well-planned toolpath reduces sudden load changes, which is one reason a strong digital workflow matters. Our article on CAD/CAM integration for furniture and panel workflows explains how planning and simulation cut costly mistakes, and the same principles apply to stone.
Cause 8: Handling, Storage and Transport Damage
Sometimes a slab is already damaged before it reaches the machine.
- Store slabs upright on A-frames with proper padding, not flat in stacks that can crack under uneven load.
- Use correct lifting equipment, such as vacuum lifters or suitable clamps, rather than improvised methods.
- Avoid impacts at corners and edges during loading.
- Let slabs acclimatize if they have moved between very different temperatures.
- Do not lean or drop slabs onto hard, uneven surfaces.
Train your team on safe handling. A tiny hairline crack from careless transport can grow into a full split once cutting begins.
Step-by-Step Troubleshooting Process
When a slab cracks or chips, avoid guessing. Follow a systematic process:
- Identify the failure type: entry chip, exit chip, edge chip, corner crack or mid-cut split.
- Note where it happened: near a vein, at a corner, at the start or end of the cut.
- Inspect the slab: look for pre-existing fissures or reinforcement problems.
- Check support and clamping: confirm the slab was fully and evenly supported.
- Examine the tool: look for wear, glazing or damage.
- Review cutting parameters: compare feed, speed and depth with recommendations.
- Verify cooling: confirm consistent flow at the cutting point.
- Test the machine: check for vibration, runout and looseness.
- Change one variable at a time and test on an offcut.
Changing many things at once makes it impossible to know what solved the problem.
Preventive Maintenance Checklist
Consistent habits prevent most issues:
- Inspect every slab before loading.
- Check table flatness and leveling weekly.
- Clean and inspect tools at the start of each shift.
- Clean nozzles and filter coolant regularly.
- Lubricate and inspect rails and screws on schedule.
- Keep a test offcut for each new material batch.
- Record settings that work for each stone type so they can be reused.
Choosing the Right Machine to Reduce Cracking and Chipping
A well-built machine gives you a much wider safety margin. For stone work, look for:
- A heavy, rigid gantry that absorbs vibration.
- A powerful spindle with stable speed control.
- Effective water cooling and drainage.
- A flat, robust table with good support options.
- Accurate linear guides and drives for smooth motion.
- A reliable controller with good toolpath control.
At Kataria Tech Zone, we supply machines built for demanding stone applications. Explore our CNC Stone Router Machines for carving, engraving and slab processing, and see our wider range of CNC Router Machines for other materials. You can also browse every option in our machinery shop.
If you work on decorative or architectural stone, you may also like our post on CNC stone routers in temple architecture, which covers intricate panel and pillar carving.
Frequently Asked Questions
Why does my stone slab crack during CNC cutting?
The most common causes are hidden fissures, poor support, excess clamp pressure, heat shock and aggressive cutting parameters. Often it is a combination.
How do I stop chipping at the edges of a cut?
Use sharp diamond tooling, ramp into the cut, slow the feed at entry and exit, and support the slab fully. A fine-grit finishing pass also helps.
Does coolant really affect cracking?
Yes. Inadequate cooling causes thermal stress and tool glazing, both of which increase cracking and chipping risk.
Are some stones more likely to crack than others?
Yes. Natural marble with veins and fissures is generally more delicate than dense, uniform granite, while engineered stone can hold internal stress. Adjust your approach to each material.
Can I repair a chipped edge?
Minor chips can often be filled with color-matched stone resin and polished, but prevention is far cheaper than repair.
What machine features matter most for stone cutting?
Rigidity, spindle quality, cooling system, table support and accurate motion components are the most important.
Conclusion
Preventing slab cracking and chipping in CNC stone cutting is about controlling stress from every direction. Inspect slabs carefully, support them fully, choose the right diamond tooling, set sensible feeds and depths, keep cooling consistent, design gentle toolpaths and maintain a rigid, well-serviced machine. Fix one variable at a time and record what works, and your scrap rate will fall quickly.
Ready to upgrade your stone processing? Explore the CNC Stone Router Machines at Kataria Tech Zone, visit our shop, or read more expert guides on the Kataria Tech Zone blog. Contact our team for a machine recommendation matched to your stone, volume and budget.