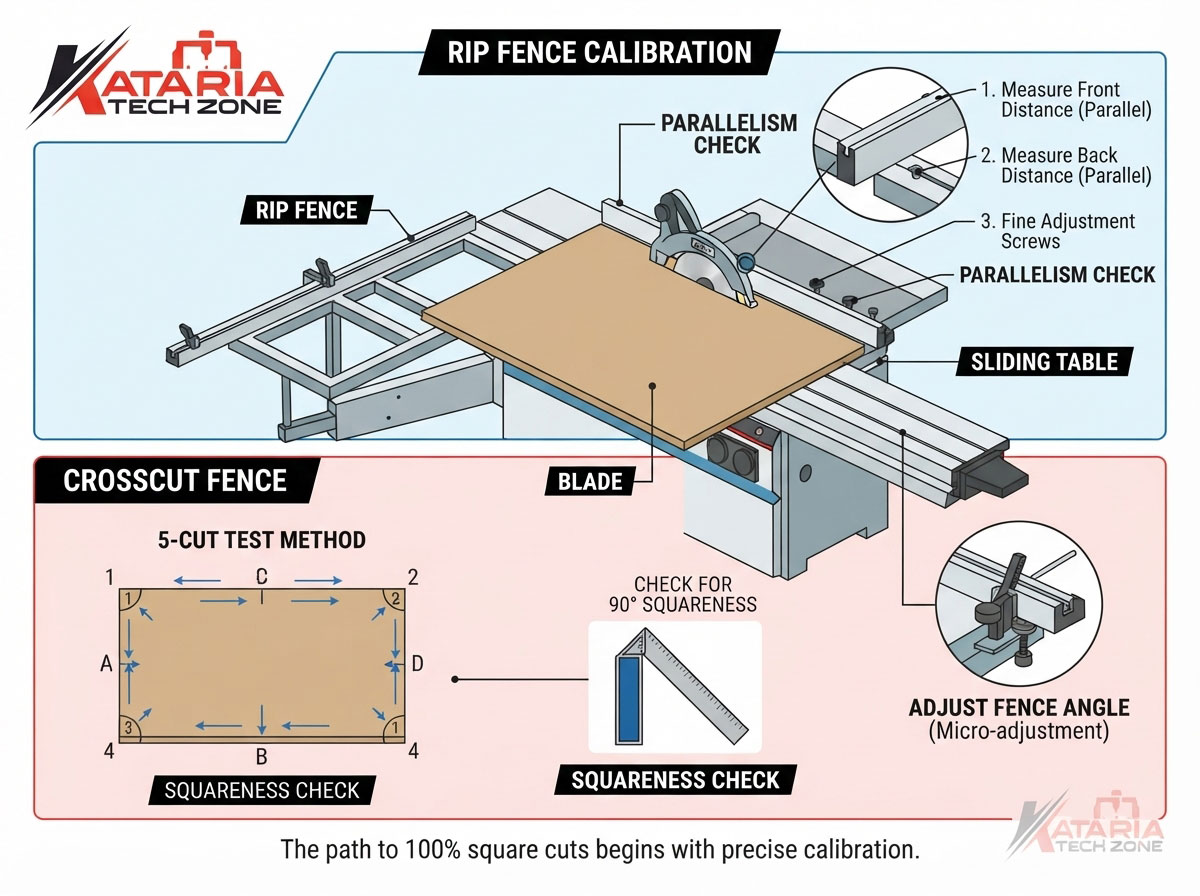
A panel saw is only as accurate as its fences. You can run the sharpest blade in the shop, but if the crosscut fence sits even a fraction of a degree off 90°, or the rip fence drifts a hair out of parallel with the blade, every sheet you cut inherits that error — and it compounds fast across a batch of cabinet parts or modular kitchen panels. A cut that’s off by 0.2mm on one edge doesn’t sound like much until you’re squaring up twenty identical panels and none of them close flush.
At Kataria Tech Zone, calibration questions are among the most common we get from workshops running our panel saws — not because the machines drift often, but because most shops never check until a job comes back with visibly out-of-square corners. This guide walks through why fences go out of calibration, how to check both the crosscut fence and rip fence properly, and how to bring them back to true — no specialized metrology equipment required, just a good square, a tape measure, and some patience.
Why Fence Calibration Matters More Than People Think
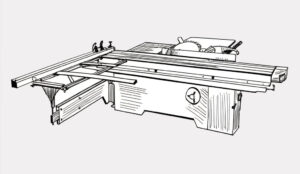
On a sliding panel saw, the crosscut fence controls the angle of cuts made across the sliding table, while the rip fence controls the width of cuts made parallel to the blade. Both need to be dead accurate relative to the blade for a panel to come out truly square — meaning all four corners are 90°, and opposite sides are equal in length.
A panel that’s out of square causes problems well beyond that one cut:
- Edge banding won’t seat cleanly on a panel with an inconsistent edge, leaving visible gaps or requiring rework.
- Cabinet carcasses won’t close square, which shows up later as doors that don’t align or drawers that bind.
- Nested cutting lists compound the error — if you’re cutting multiple parts from one sheet, a fence that’s off by even 0.5° can throw every subsequent part out by a growing margin.
- Material waste increases, since out-of-square parts often get scrapped or require a second trimming pass.
Fence calibration isn’t a one-time setup step — it drifts. Vibration from daily use, minor impacts from loading and unloading sheets, seasonal changes in humidity affecting the machine’s frame, and general wear on locking mechanisms all nudge a fence out of true over time. Most professional shops check calibration on a set schedule rather than waiting for a visibly bad cut to flag the problem.
Tools You’ll Need
Before starting, gather a few basic tools — nothing exotic:
- A verified engineer’s square (not a standard carpenter’s square — those are rarely accurate enough for this work)
- A quality tape measure or steel rule, ideally with millimeter graduations
- A dial indicator or feeler gauges, if your saw’s fence has fine-adjustment screws
- Test material — offcuts of MDF or plywood, at least 600mm x 600mm, with one factory-straight edge if possible
- A pencil and marker for labeling test cuts
- The saw’s adjustment tools — typically hex keys or a spanner, specific to your machine
Skip anything less accurate than an engineer’s square for the initial reference — calibrating against an inaccurate square just transfers the error onto your fence instead of removing it.
Step 1: Check the Blade Itself First
Before touching either fence, confirm the blade is running true. A warped, damaged, or poorly seated blade will make even a perfectly calibrated fence produce inaccurate cuts, and you’ll end up chasing a problem that isn’t actually in the fence at all.
- Rotate the blade by hand and check for visible wobble or runout.
- Confirm the blade is fully seated against the arbor flange with no debris trapped behind it.
- Check that the blade is tightened to the manufacturer’s specified torque — loose blades flex during the cut.
If the blade shows runout beyond a fraction of a millimeter, replace or true it before proceeding. Calibrating fences against a bad blade wastes time and gives you a false result.
Step 2: Calibrate the Rip Fence
The rip fence needs to be perfectly parallel to the blade — not angled toward it (which causes binding and burning) or away from it (which causes an inconsistent cut width along the length of the panel).
2.1 Measure parallelism at both ends of the blade
- Lower the blade fully, or use a blade-height reference point that’s safe to measure against.
- Measure the distance from the rip fence to the blade at the front of the table.
- Measure the same distance at the back of the table, at the same blade tooth position (rotate the blade by hand to align the same tooth at both measurement points for consistency).
- Compare the two measurements. They should match within 0.1mm on a well-calibrated machine; anything beyond about 0.3mm is worth correcting.
2.2 Adjust for parallelism
Most sliding panel saws allow the rip fence rail to be adjusted via mounting bolts or fine-adjustment screws at each end of the fence rail.
- Loosen the fence rail mounting bolts slightly — just enough to allow small movement, not so much that the fence can shift on its own.
- Adjust the rail at the end showing the discrepancy, nudging it toward true parallel.
- Re-measure at both ends. Repeat in small increments until both measurements match.
- Tighten the mounting bolts fully, then re-check both measurements once more — tightening can shift the fence slightly, so this final check matters.
2.3 Test cut
Rip a piece of test material along its length. Measure the width at both ends of the cut piece. If the two measurements match within your tolerance, the rip fence is correctly calibrated. If not, repeat the adjustment.
Step 3: Calibrate the Crosscut Fence
The crosscut fence needs to sit at exactly 90° to the blade (or at the precise angle indicated on the miter scale, if you’re setting an angled cut). This is the fence most responsible for whether a panel’s corners come out square.
3.1 Baseline square check
- Position the crosscut fence at its 90° stop.
- Place your engineer’s square against the fence face, with the square’s blade extending toward the saw blade.
- Check for any visible gap between the square and the fence along its full length. Even a hairline gap at one end indicates the fence is out of true.
3.2 The 5-cut test (recommended for precision work)
A visual square check catches large errors, but the 5-cut test is the standard method for detecting even very small misalignments, and it’s worth running whenever precision matters — cabinet doors, modular furniture components, or any job where multiple identical parts need to match.
- Cut a piece of test material into a rough square, roughly 400–600mm per side.
- Label one corner “1” and mark the edges in order going around the piece (edge A, B, C, D).
- Crosscut edge A. Without changing the fence setting, rotate the piece and crosscut edge B (the edge adjacent to A, going clockwise). Repeat for edges C and D, always using the same fence setting and always cutting the same amount of material off each time.
- After the fourth cut, you’ll have trimmed all four sides once, arriving back at edge A’s side, but now with a small amount of material still to remove — this is the actual test cut.
- Make a fifth, final light cut on this same edge, removing just a sliver of material.
- Measure the length of this fifth cut piece at both ends.
- Divide the difference between the two end measurements by four. This tells you how far out of square the fence is, expressed as a ratio you can use to correct the angle precisely — a difference of 0.4mm over a 500mm cut, for example, points to a small but measurable angular error that a visual check alone might miss.
This method self-amplifies any error across the four cuts, which is why it catches misalignments a single square check can miss entirely.
3.3 Adjust the crosscut fence angle
- Loosen the fence’s angle-lock mechanism (usually a lever or bolt at the pivot point).
- Using the error measured in the 5-cut test, nudge the fence in the appropriate direction. Most fences have a fine-adjustment screw for exactly this — use it rather than trying to nudge the whole fence by hand, which is much harder to control precisely.
- Re-lock the fence and repeat the 5-cut test.
- Continue in small increments until the difference between the two end measurements falls within your acceptable tolerance (for most cabinetry and furniture work, within 0.1–0.2mm over a 500mm cut is a reasonable target).
3.4 Reset the 90° stop
Once the fence is verified square, if your saw has an adjustable mechanical stop for the 90° position, reset it to match this newly verified position. This way, if the fence is ever moved for an angled cut and returned to 90°, it comes back to the correct calibrated position rather than a stop that was never accurate to begin with.
Step 4: Verify Under Real Working Conditions
A calibration check with a small offcut doesn’t always reflect what happens with a full sheet. Once both fences are calibrated:
- Cut a full-size sheet (or a large offcut close to typical sheet size) using both fences in sequence, as you would on a real job.
- Check squareness on all four corners with your engineer’s square.
- Measure opposite sides for equal length.
- If everything checks out, log the date and the measurements somewhere accessible — a simple maintenance log helps you track how quickly the machine drifts and lets you set a realistic recalibration interval.
How Often Should You Recalibrate?
There’s no universal number — it depends on usage intensity, material types, and how the machine is treated day to day — but as a general guideline:
- High-volume production shops: check weekly, full calibration monthly
- Standard commercial workshops: check monthly, full calibration quarterly
- Light or occasional use: check quarterly, full calibration twice a year
- After any impact, relocation, or maintenance work on the fence rails: always recheck before running a job
Building this into a routine maintenance schedule — alongside blade changes, dust extraction checks, and lubrication — catches drift before it reaches a customer’s cabinet parts.
Common Calibration Mistakes to Avoid
- Using an uncalibrated square as your reference. If the square itself is off, everything you calibrate against it will be off too. Verify your square periodically against a known-accurate reference.
- Adjusting only one fence and assuming the other is fine. The rip fence and crosscut fence are independent systems — calibrating one doesn’t correct the other.
- Skipping the blade check. A bent or poorly seated blade can mimic the symptoms of a fence calibration problem, leading to unnecessary fence adjustments that don’t fix the actual issue.
- Not re-tightening mounting hardware fully before the final test. Loose hardware can let a freshly calibrated fence shift slightly under normal cutting pressure.
- Testing with material that isn’t flat. A warped or bowed test piece will throw off your measurements regardless of how accurate the fence actually is.
When Calibration Alone Isn’t Enough
If a panel saw repeatedly drifts out of calibration within days of adjustment, that’s usually a sign of a mechanical issue beyond normal wear — worn rail bearings, a loose table, or a frame that’s lost rigidity over years of use. At that point, it’s worth having the machine inspected rather than continuing to chase the same adjustment on a recurring basis. This is also a common trigger point for shops evaluating whether to invest in a vertical or horizontal panel saw upgrade, particularly if production volume has grown past what the current machine was built to handle.
For a deeper look at what separates a precise panel saw from one that struggles to hold calibration, see our guide on what specific features of panel saws boost cutting speed and accuracy, and our overview of what a panel saw actually is and how the different types compare.
Final Thoughts
Fence calibration is one of those maintenance tasks that’s easy to postpone — the saw still cuts, after all — until a batch of parts doesn’t fit together and the cost of the error is suddenly much higher than the ten minutes it would have taken to check the fences. Building a regular calibration check into your shop’s maintenance routine, using a proper reference square and the 5-cut test for precision work, keeps that cost off the table entirely.
If you’re running an older panel saw that struggles to hold calibration despite regular maintenance, or you’re scaling production and need a machine built for tighter tolerances from the start, browse Kataria Tech Zone’s range of panel saws — including our precision sliding table panel saw — or get in touch through our contact page to discuss what fits your production line. For related equipment that depends on square, accurate panel cuts, take a look at our edge banding machines, and explore more workshop guides on the Kataria Tech Zone blog.